
If you have landed here because you got a D.I.Y Bracelet in our new exciting vending machine at Renegade Craft Fair, or the Brighton Etsy Craft Party goody bag then WELCOME! I'm about to teach you how to make a macrame friendship bracelet! If you are here in any other way you can still do the tutorial you just won't have a designosaur starter bead to set you off (if you super desperately want one tweet us, we'll see what we can do!)
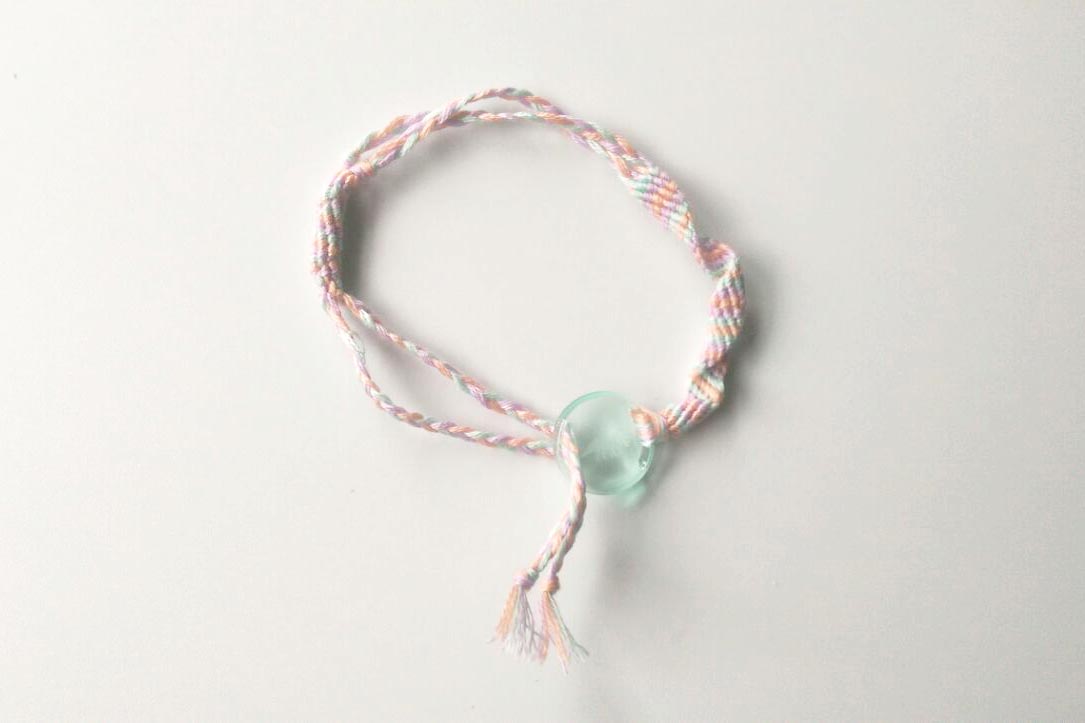
OK So are you ready? This is what we are making...
 |
You will need: threads - three different colours | scissors | a designosaur bead | a ruler
If you want a bracelet exactly like mine (which is BLAH length long) then you will need to cut your threads to 90cm. If you are using the materials provided then your threads are already 90cm long!
|
 |
First fold your threads exactly in half.
Then thread the folded end though one side of the designosaur bead. Thread the reamining thread the newly created loop. Your thread is now securely attached to the bead. |
 |
Use a Safety pin through the open side of your bead to attach your bracelet to a cushion/ your jeans / your book bag
I have taped mine to the table for the purposes of photographing but trust me - safety pinning is the easiest way to stop it coming unattached!
Lay out your threads in the following pattern (or any pattern you like, if you put two of the same colour thread together, this will create a thicker row)
|
 |
| Take the furthest left thread [1] (mine is coral) |
 |
| Lay this over the second thread [2] (mine is aqua) to create a four shape |
 |
| Tuck the coral thread [1] under the aqua [2] thread to create a loop |
 |
| Hold the aqua thread [2] taught and slide the coral thread [1] upwards |
 |
| Slide the knot right to the top, this is a left knot (and the only knot we will be using!) |
 |
In case you didn't get that we are going to do it again on the lilac thread [3]
Cross the coral thread [1] over the lilac thread [3] to create a 4-shape
|
 |
| Thread the coral thread [1] under the lilac thread [3] to create a loop |
 |
| Slide the newly created knot using the coral thread [1] to the top of the lilac thread [3] |
 |
You now need to do the same left knot on threads [4] [5] [6].
You have completed a whole row of knots, WELL DONE!
(you're still with me right?)
|
 |
The aqua thread [2] will now be the furthest left string.
Do exactly the same as you did with the coral string [1] across threads [3] [4] [5] [6] [1]
|
 |
Repeat this always working from Left to Right with the furthest left thread
Do this for about 10cm until your bracelet looks like mine!
|
 |
At this point split your threads into two sections of three threads
Plait the two separate sections (if you don't know how to plait/ braid then I'm not sure how you even got his far, give up now - or google plaiting)
This section should be about 7cm long
|
 |
| Your plaits should look like this |
 |
| Tie a knot in the first plait (make sure your plaits are the same length) |
 |
| Tie a knot (overhand knot if you wanna get technical) in the other side |
 |
| Make sure that both the knots are in the same place (else you're gonna have a wonky bracelet from here on out!) |
 |
| Go back to the beginning of the tutorial and do the same left knots to create the second part of the bracelet (or use the power of memory!) |
 |
| Should look something like this? |
 |
| Do this until your threads get too short / you get bored / your bracelet gets to a wearable length Then split your threads into two parts again |
 |
| Plait / braid the two sections to finish off your bracelet |
 |
Tie a knot in the ends of the plaits
Trim the ends (not too close to the knot else it will come untied!)
|
 |
| This is what you've made HURRAH! |
 |
Thread the two plaits through the otherside of the designosaur bead (you may need to jam the knots through using that safety pin you have!)
Put your bracelet on you or your friend
Use an overhand knot or two to secure the bracelet.
ENJOY!
|
I'm really hoping at the end of this tutorial you have a bracelet that is somewhat similar to mine. You all got different colour threads and beads (in your goody bags) so if you have successfully made a bracelet please use #designosaur to show us, and @designosaurYEAH on instagram or twitter.
If this is a good tutorial let me know, (I might do another?!) equally if it sucks and you're looking at a tangled mess also let me know! (I won't do another)
ROAR!
Karli


